Building the Peregrine Galley: Standing Rigging
Making Small Parts
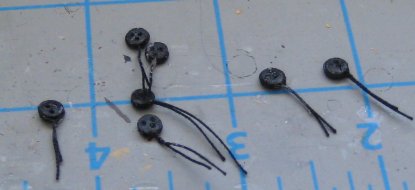
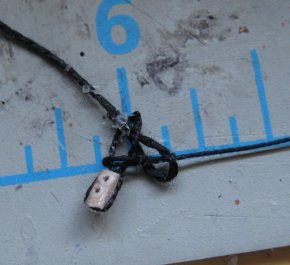
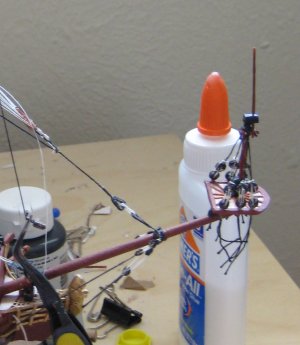
Deadeyes
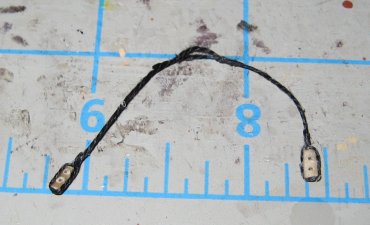
Deadeyes are made from small paper discs punched out of 2-ply card. Set your rotary punch to the desired size and punch out a lot of holes. Now set it to one size smaller and punch out half as many holes. The deadeye is formed from a sandwich of two larger discs on the outside with a smaller one in the inside; this forms a groove on the ende that will make it much easier to strop later (and more secure and less liable to slip). Use your pin vise to drill out the three holes and paint black.
Blocks
My first attempt at making blocks was really simple. I simply cut 1/16 inch strips of 4-ply cardstock that has been colored light brown by marker before lamination; this ensures that they are brown through and through. Use CA glue to stiffen the strip to a plastic-like consistency. When you need a block, drill a small hole near the end with a pin vise (this represents the sheave), then cut off the end of the strip to form your block.
Since 1/16 inch blocks are tiny (smaller than commercially manufactured wood blocks for wood ship models), stropping them to the lines is really tricky. I suggest using tacky glue to "strop" the blocks; a proper seizing is nearly impossible at this scale but can be passably faked by twisting the stropped strands together with your fingers while the glue is still wet.
My next version is considerably more complex but better looking. I used my hole punch to make lots of 1/16 circles out of 2-ply. These were glued to another strip of 2-ply, as shown.
A final strip of 2-ply is glued on top of that and the whole thing stiffened with CA. Whenever I need a block, I cut one out from the strip. The hole for the sheave is drilled in the dimpled spot between two of the inner circles. For fiddle blocks, just cut out a double-long section and use a file to taper them. These blocks are much more convincing but cannot be made much smaller than about 3mm.
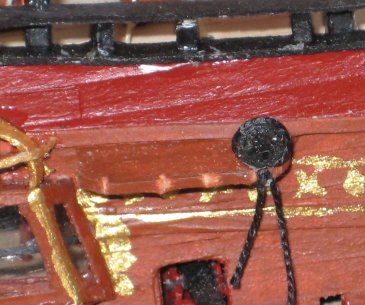
Eyebolts and Hooks
Eyebolts at this scale are exceedingly difficult in any medium and essentially impossible with paper. We fake them. For example, loading tackles are supposed to have a hook at the end hooked to an eyebolt in the channels. We fake this by simulating the entire hook and eyebolt assembly on the end of the block with twisted strands of thread and glue, and then glue this end to the channel. The lanyards are adjusted later for tension. The end result looks like something was attached, but in reality we have set it up differently.
Eyebolts for moveable parts or parts where we have to adjust the tension (for example, on the topmast caps for the topgallant stays) can be made of a tiny loop of thread held together by white glue and stiffened with CA. These parts are quite fiddly and fragile, but you get an actual eyebolt that you can reeve a line through and work.
Common Tasks
Stropping deadeyes to channels
You will be doing this a lot. First we strop the deadeye to shroud line. I usually use glue to do this, gluing the line to the deadeye. Ensure that one hole is at the bottom and two are at the top.
Cut a notch where the deadeye goes in the channel and fit the stropped assembly in. Secure with a little bit of glue.
Later, after the rigging goes up, we'll glue on a channel cap, cut off all the loose ends, and then put the chainplates in place underneath.
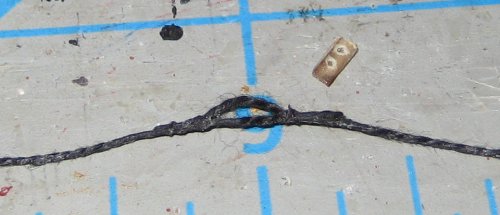
Eyesplice on shrouds
Whenever there are an odd number of shrouds on a side, one of them (usually the foremost or aftmost) connects to both port and starboard with an eyesplice in the middle that goes over the mast. It isn't practical to do a real eyesplice on this scale, so we fake it by taking two lengths of rope and gluing/siezing the ends together to form an "eyesplice" in the middle.
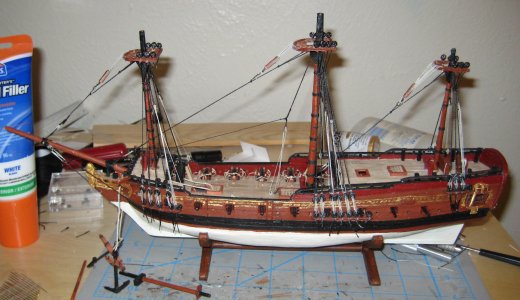
Standing Rigging Overview
We will begin with the bowsprit, and then proceed from the back of the ship: mizzen, then main, then fore mast. We go one level at a time: the lower masts, then the topmasts, then the topgallants.
Other modelers may prefer different orders, but this is mainly because the stay for a mast is usually secured to the next lower mast in front, and my order means you don't have the shrouds of the mast in front in the way when you attach the stay.
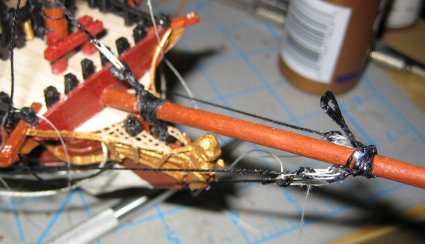
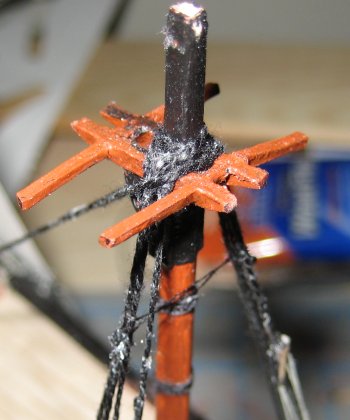
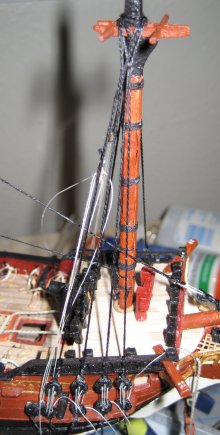
Bowsprit
The gammoning has already been fitted earlier. There are two smaller pieces of standing rigging that remain to be fitted.
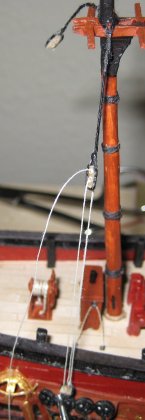
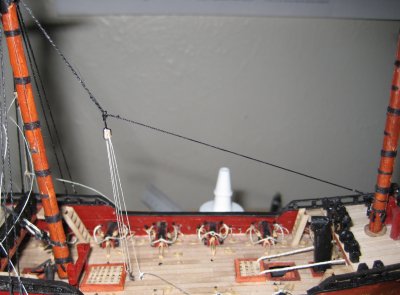
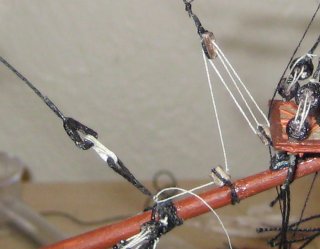
Bobstay
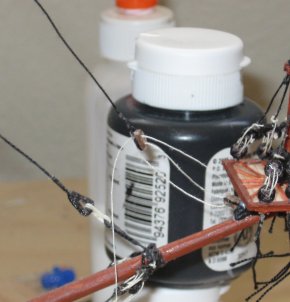
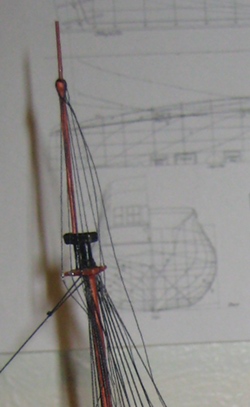
The bobstay pulls the bowsprit down and counteracts the tension from all the other stays pulling the bowsprit up. A deadeye is siezed to a collar on the bowsprit just forward of the collar of the forestay. Another collar is siezed through a hole in the knee about halfway between the fore side of the gammoning and the fore side of the figurehead. Another deadeye goes on the end of this line; the two deadeyes are connected by lanyards in the usual manner and are quite close to the bowsprit.

The above image shows the setup of the bobstay. The extra deadeyes to either side of the collar on the bowsprit are for shrouds.
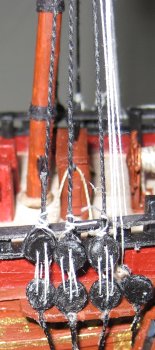
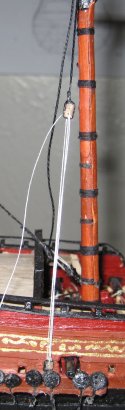
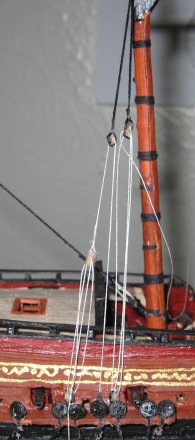
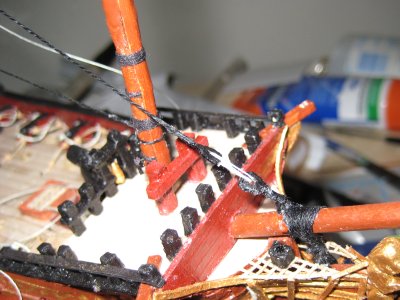
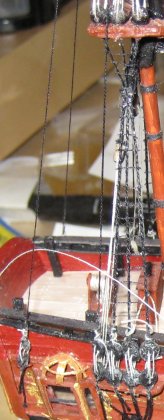
Bowsprit Shrouds
The bowsprit shrouds prevent the bowsprit from moving side to side. They are set up with deadeyes much like the bobstay, with the other end attached to the wales.
This picture shows the bowsprit shrouds. The attachment point on the hull is on the wales. The thing you see sticking up above the shroud deadeyes is the fore stay heart/collar, which will be hooked up much later.
Mizzen Mast
There are four deadeyes on the mizzen channel, equally spaced. The first three are for the shrouds. The fourth (aftmost) is for the mizzen topmast backstays. Additionally, the mizzen burton tackles are affixed to the channels.
The rigging must be installed in this order as the pendants, shrouds, stays all go over each other over the mast and must overlap in a certain order to be correct.
Mizzen Burton Tackle
The first standing rigging to go over the mast are the burton tackles. One burton tackle goes down each side. The pendant in a real ship is made with a spliced eye with the same stuff as the shrouds, with the ends going about halfway down. Fit a double block to that end.
The other end is a single block with a hook stropped to one side and a line on the other. The line runs up to the inner sheave on the double block, back down through the single block, then up to the outer sheave of the double block, then down to the belaying point, making a 4-part fall. In ships of the time, the burton tackles, when not in use hauling things, doubled as "shifting backstays" of sorts, helping the shrouds secure the mizzen mast. They are usually taken aft of the shrouds; I place them by the mizzen topmast backstay.
Here you can see it is being held in place by tweezers; do not fix the lower end until the shrouds are up. Simply glue the lower end in place when ready and belay the free end to the rail nearby.
Mizzen Shrouds
There are three pairs of shrouds. Remember that the odd pair, the aftmost one, is done with an eyesplice and leads both to port and starboard. The shrouds run to the three deadeyes shown on the plans.
Mizzen Stay
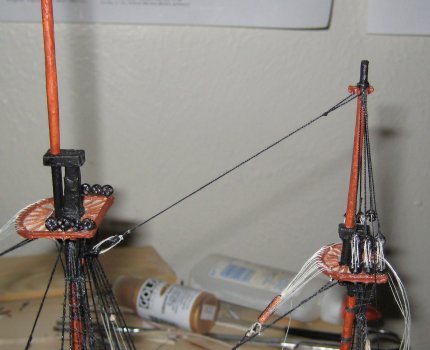
The mizzen stay loops over the shrouds with a mouse and has a heart on the end. The other heart is secured to a collar on the mainmast, which needs to be stepped at this time. We set up the mizzen stay now because it will be easier without the main shrouds in the way.
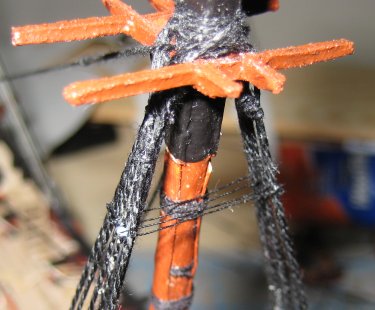
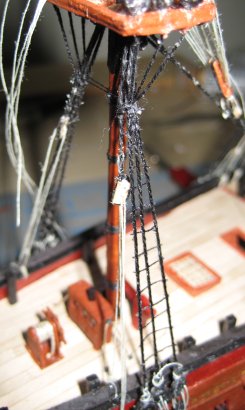
Mizzen Futtock Stave and Catharpins
The futtock stave is made from shroud-thickness thread soaked with CA glue to stiffen it. I simply glued the futtock stave to the outside of the shrouds. You can find the point of attachment by eyeballing it with the mizzen top in place; it should be approximately on a line running from the edge of the top down to the opposite deck by the bulwark (ie, where the Bentnick shrouds would lie, except they weren't invented yet by 1700).
You'll also want to fit the catharpins at this time. It is exceedingly difficult to tie satisfactory knots and bind the catharpins as you would on a real ship, so I approximated them by laying thread down and simply gluing them in place to the futtock stave.
Incidentally, the picture also illustrates how the top ends of all the shrouds and the stays should look when looped over the top. Quite appealing!
Main Mast
There are seven deadeyes in the main channels. The first six are for the main shrouds while the last is for the main topmast backstay. These are grouped to avoid fouling the gunports and oarports, in groups of two (before the gunport), two (aft of the gunport and before the oarport), two (between the second gunport and the oarport), and one (aft of the gunport). Additionally, there is a small "stool" channel abaft the main channel and up higher; this includes two deadeyes for the second topmast backstay and for the topgallant backstay. Additionally, two main tackles per side are led to the channels.
Main Tackles
The pendants for the main tackles are set up like shrouds and run about halfway down. There are two pendants on either side, 4 tackles total. One is simple and the other complex.
The simple one is just a 4-part fall, a double block on the pendant end and a single block on the hook end. It is set up like the burton tackles. The hook goes to an eyebolt between the third and fourth deadeyes on the main channels, the free end is belayed.
The complex one has a runner with a 4-part fall; the runner's end goes between the third and fourth deadeyes while the tackle end goes between the fourth and fifth deadeyes.
Main Shrouds
The shrouds are set up as you might expect. There are six pairs, all shown as the larger deadeyes on the plans. The last one I figure is for the topmast backstay instead of a shroud.
Garnet Tackle
The garnet tackle pendant goes over the loops of the shrouds and is made similarly. For this ship, I believe there is only one garnet tackle. Take the pendant over the starboard side, outside the trestletrees and between the crosstrees (the main stay loop will go over this). The guy is affixed to the fore mast. The tackle itself is a standard 4-part fall with the hook going to an eyebolt in the deck just in front of the main hatch, with the free end belayed to a cleat near the same spot.
Main Stay
The mainstay runs to the bowsprit. It is set up with hearts just forward of the foremast; the stay comes from the mainmast past the starboard side of the foremast to a heart, with the other heart attached to a collar just abaft the gammoning on the bowsprit.
Main Futtock Stave and Catharpins
This is set up more or less like the mizzen catharpins before, but since there are more shrouds, there are more lines.
Fore Mast
There are five deadeyes shown on the plans; these look reasonable. Again, the first four are shrouds and the last one is for the topmast backstay.
Fore Tackles
Since this is a small ship, I put only one fore tackle on each side of the mast. This is set up very much like the mizzen burton tackles, led fairly far back (almost to the topmast backstay) on the channel.
Fore Shrouds
Shrouds are set up as expected. There are four pairs (the fifth deadeye is for the fore topmast backstay).
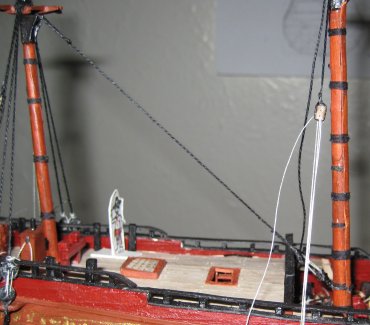
Shown below are the fore shrouds and tackles set up (starboard side).
Fore Catharpins
Same as the others, really.
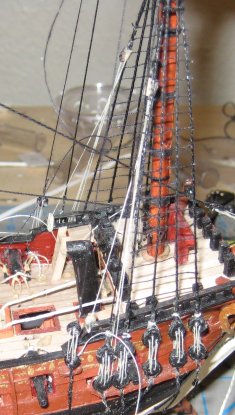
Fore Stay
The forestay goes to the bowsprit with hearts. The collar is secured above the gammoning just behind the bobstay. I forgot to take a picture during construction, but here is one from later, also showing the crowsfeet.

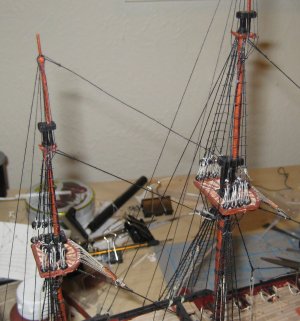
Lower Mast Tops
Before we move on to the topmasts, we need to install the tops for the lower masts. All of them are installed similarly.
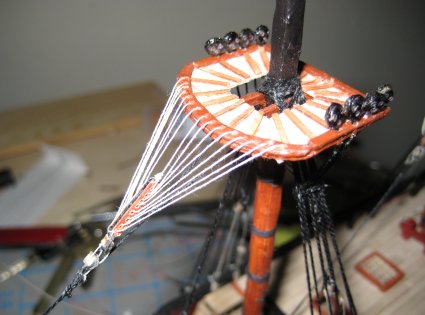
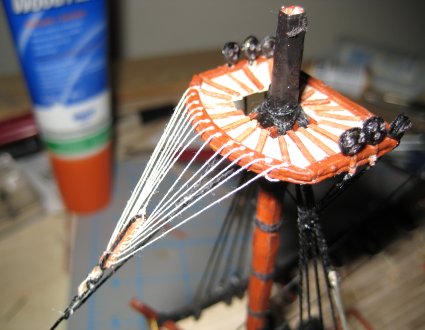
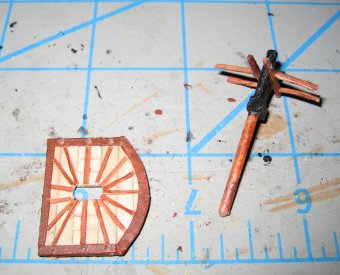
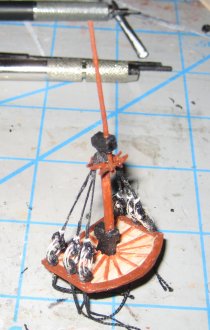
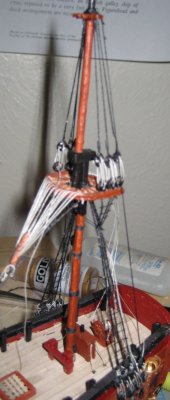
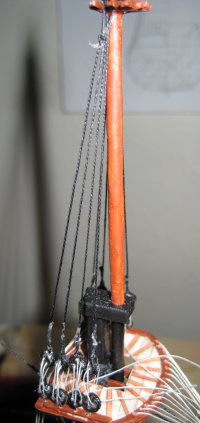
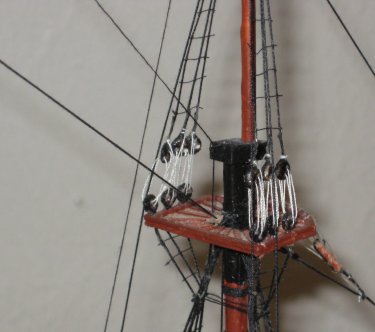
Mizzen Top
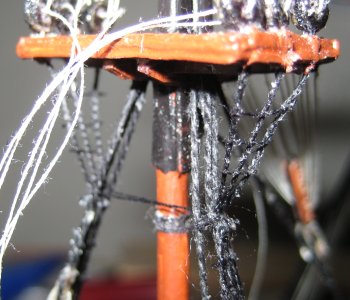
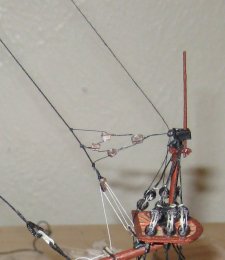
Below is the assembled top and the euphroe for the crowsfeet. You want to build as much off-ship as possible as it gets harder once attached.
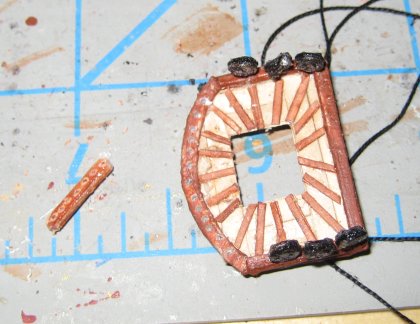
Now we attach them and run the thread on the bottom (which the deadeyes are stropped to) to the futtock stave. This isn't strictly accurate as there should be a separate chainplate, but at this scale it is essentially indistinguishable.
Don't forget ratlines on the futtock shrouds! The sailors have to be able to climb up somehow.
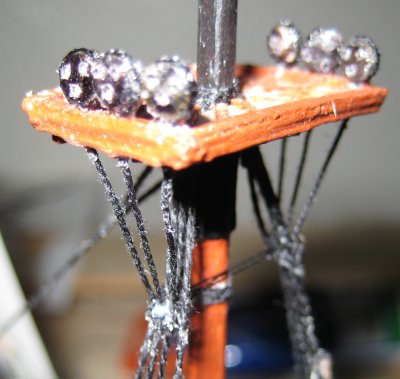
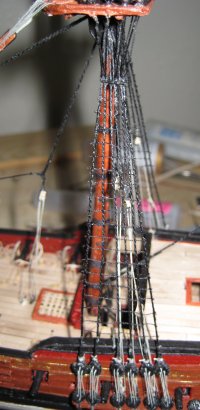
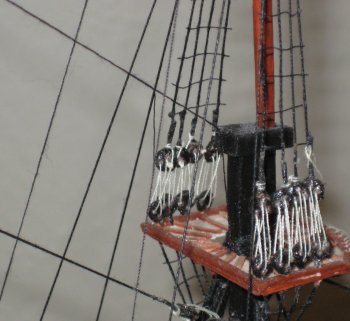
Main Top
The main top is fitted similarly, but there are four deadlines and futtock shrouds. Note the catharpins below as well.
The picture below illustrates the crowsfeet. Start from the rear of the euphroe and alternate sides, always passing the lien over the top. The last one goes to the port side (you can see the knot under the top). The euphroe itself is held to the stay with blocks, as shown.
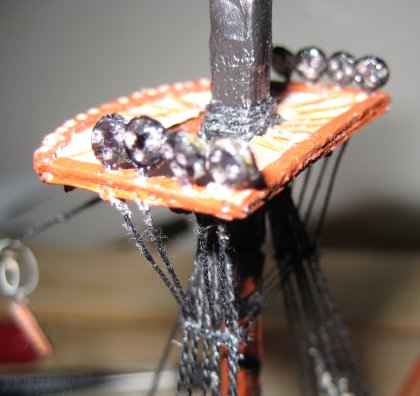
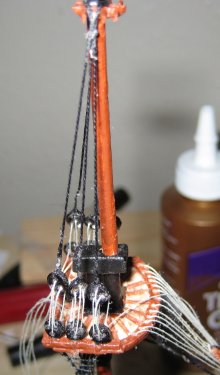
Fore Top
The fore top is much the same. You can see the blocks connecting the euphroe of the crowsfeet to the stay somewhat better here.
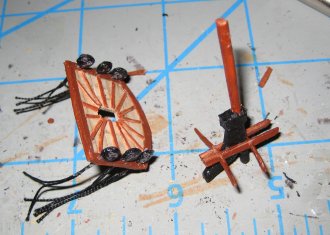
Sprit Top
First, it is unclear whether the ship actually had a sprit top. The paintings depict crosstrees but not a complete top. As a bit of artistic license, I decided to make a sprit top anyway. If you want to stick with the (likely more accurate) crosstrees-only configuration, omit the top and the deadeyes and run the sprit topmast shrouds through the crosstrees like the topgallants on the other masts.
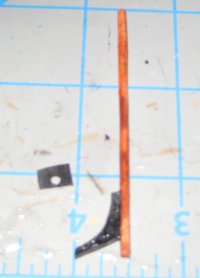
First, we need to make the knee and the cap and attach it to the mast. The knee should be at least 6-ply card as it needs to be strong.
The top is made like the mizzen top, but smaller, and the cap and crosstrees assembled just like every other one.
Desdeyes are attached, three per side.
Run shrouds up to the top, tension the deadeyes in the usual way, and then install the cap and the flagstaff.
Finally, attach to the end of the bowsprit:
Lower Ratlines
You could put them off, but I find it easier to do them now. First, let's have a look at the lower masts in place:
Here are the ratlines for the mizzen shrouds. With the thin lines I'm using (remember that the Peregrine Galley is actually quite a small ship, so the lines are even thinner than they would be in an already small 1/96 scale) I could not do acceptable clove hitches, so I adopted an easier solution: thread the lines through the shrouds with a fine needle, secure with PVA glue, and cut off the extra. Not as convincing as real knots, but much faster than doing a thousand or so knots.
The main ratlines are more of the same.
The ratlines on the futtock shrouds are handled in the same manner as all the others. I put three ratlines on each of them, largely for ease of eyeballing.
Mizzen Topmast
Mizzen Topmast Shrouds
Three pairs, set up as expected.
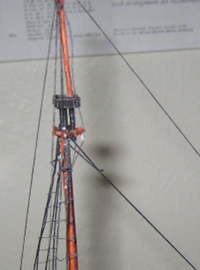
Mizzen Topmast Backstay
No different than on the lower masts. The mizzen topmast backstay goes to the fourth slot on the mizzen channels.
Mizzen Topmast Stay
The stay collar is on the mainmast, just below the bibs. The whole thing is tensioned with deadeyes.
Main Topmast
Main Topmast Tackles
I decided to omit them from the model (Peregrine Galley was a really small ship and may or may not have had them, but I also forgot until it was too late). If you do want to set them up, there is only one on each side (set up with a cut splice) and of the simple variety. The runner goes down to the top.
Main Topmast Shrouds
There are 4 pairs, one to each deadeye.
Main Topmast Backstay
Two of them. The small deadeye between 5 and 6 on the plans is where the first one goes, and the last deadeye is where the second one goes.
Main Topmast Stay
Goes to a block above the fore top and then down to a tackle hooked to an eyebolt on the deck.
Fore Topmast
Fore Topmast Tackles
I also forgot these. You can set them up if you like. As in the mainmast, one per side and a simple 4-part fall. The runner goes to the top.
Fore Topmast Shrouds
Only three pairs. Set up the same way as all the others.
Fore Topmast Backstay
Goes to the last deadeye on the fore channel.
Fore Topmast Stay
This one is more complex. First, we run the stay as usual, but set up a block and tackle near the knee of the spritsail topmast:
It is then taken aft to the center sheave of a triple block (the others are for the fore topsail bowlines) and belayed to the collar of the fore topmast stay.
Mizzen Topgallant Mast
Mizzen Topgallant Shrouds
Three pairs, fitted as you'd think. The aft shroud on each side is doubled with the backstay, so no need for eyesplice.
Mizzen Topgallant Backstay
Anderson believes this should be tensioned with a deadeye on a stool aft of the corresponding channels, but as we see, there is no such stool in place. I made a small stool for it.
One alternative is simply to attach it directly to the side of the hull. For a small ship like this, you could make a good case for not bothering to set up deadeyes for the topgallant backstay.
Mizzen Topgallant Stay
The mizzen topgallant stay is similar to the mizzen top stay. It runs to a ring/eyebolt in the main topmast cap and then down to the top.
Anderson's book suggests that this was set up with a block lashed to the top and tensioned with thimbles or bullseyes. The Royal Caroline drawings show the ring/eyebolt here instead of a block, so I follow that, Also, at this scale tensioning with thimbles will be impossible, so I took it directly to the top. This is shown in more detail below:
Main Topgallant Mast
Main Topgallant Shrouds
Three pairs, fitted as usual, and the fourth becomes the backstay.
Main Topgallant Backstay
Taken to the stool/mini-channel shown on the plans. Tension with tiny deadeyes. Shown below is the lead to the stool abaft the main channels.

Main Topgallant Stay
We set this up in the same manner as the mizzen topgallant stay, through a ring on the cap and then directly to the top. The attachment point is shown below:
Fore Topgallant Mast
Fore Topgallant Shrouds
Three pairs, set up as expected, the last is the backstay.
Fore Topgallant Backstay
Taken to the stool on the plans, with deadeyes. It's the cute little thing on the little elevated stool above the fore channels, shown below.
Fore Topgallant Stay
Runs to the head of the sprit topmast, amazingly, and then through a ring down to the sprit crosstrees where it is fixed. We can cheat on the belaying by gluing it in place rather than attempt to wrap it around the crosstrees, since there is no room to maneuver there. The attachment point is shown below; it is the line on the top. You can also see the sprit topmast backstay here.

Sprit Topmast
Sprit Topmast Shrouds
We already assembled these off-ship earlier.
Sprit Topmast Backstay
One of the more atypical parts of the rigging, it is set up with a crowsfoot on the fore topmast stay and led to a pendant with a bullseye placed extremely close to the head of the sprit topmast, and from there down and belayed to the sprit top. Sources describe this as needlessly complicated, and it is. Note that I use a bullseye and not a block here; this is largely for ease.
The actual construction is a block stropped to the stay, through which we run a line with two more blocks stropped. We strop a block to the fore topmast stay and finally run a line in a W-shape as shown. Fiddly, but not as hard as you think.
The free end is belayed to the sprit top crosstrees. As it is nearly impossible to maneuver in there, I just run it through the crosstrees and belay with glue rather than trying to tie something off.